
Visa On Arrival Or eVisa for Bali? The Best Option For Indian Travellers
Dreaming of turquoise beaches, ancient temples, and bustling street markets? With over 17,000 islands, Indonesia offers endless adventures. And if you’re an Indian passport holder, you can get a Visa on Arrival (VoA) when you land or apply for an eVisa for Bali online before your trip.

I recently visited Bali for the second time, and the island continues to charm me with its lush rice terraces, beautiful beaches, ancient temples, and vibrant local culture. If you’re an Indian traveller planning your first trip or returning for another dose of island life, getting your visa sorted is an important first step. You can apply for an eVisa for Bali before departure or obtain a Visa on Arrival (VoA) when you land, making it easier to start your Indonesian adventure.
Do Indians Get a Visa on Arrival for Bali?
Yes, Indian passport holders can obtain a Visa on Arrival (VOA) when visiting Bali for a short holiday. If you’re planning a trip to Bali for tourism, visiting family, attending exhibitions or seminars, or transiting through Indonesia, the VOA can be a convenient option.
Note: If you’re travelling for employment, journalism, or an extended stay in Indonesia, you’ll need to check the relevant visa requirements and obtain the appropriate visa before departure.
Visa on Arrival for Bali: Requirements for Indian Travellers
When I visited Bali recently for the second time, I was reminded of how important it is to get the travel paperwork sorted before flying. If you’re travelling on an Indian passport, you can get a Visa on Arrival (VOA) at Bali’s Ngurah Rai International Airport (also known as Denpasar Airport). Here are a few things you should keep ready before your trip:
1. Valid Passport
Your Indian passport must be valid for at least six months from your date of arrival in Indonesia.
2. Return or Onward Flight Ticket
Carry a confirmed return ticket to India or an onward ticket to another destination. Immigration officials may ask for proof that you intend to leave Indonesia within your permitted stay.
3. Purpose of Visit
Your trip must fall within the activities permitted under the VOA, such as tourism, visiting family or friends, or transit. If asked, be prepared to explain the purpose of your visit.
4. Accommodation Details
Keep your accommodation details handy during your Bali trip. These may include:
- A confirmed hotel, resort, villa, or homestay booking.
- The address and contact details of your host if you’re staying with friends or relatives.
5. Passenger Arrival Declaration
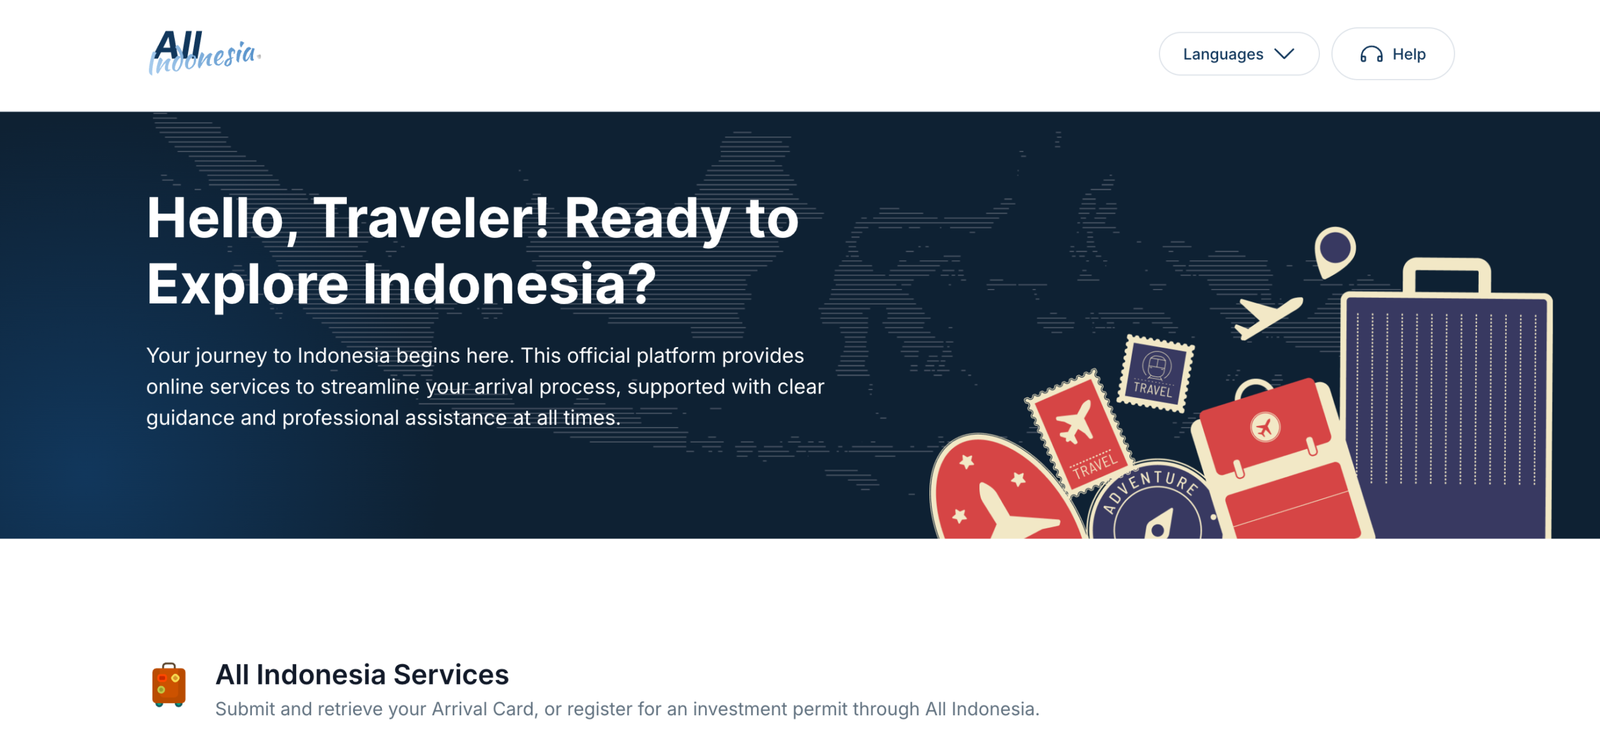
International travellers arriving in Indonesia must complete the All Indonesia Arrival Declaration through the official platform. You can generally complete it up to three days before arrival. Check the latest instructions before your departure.
6. Proof of Sufficient Funds
Although this may not be requested from every traveller, immigration officials may ask for evidence that you can cover your expenses during your stay. Carry access to sufficient funds and supporting financial documents, if needed.
7. Arrive Through an Eligible Entry Point
Make sure you enter through an authorised Indonesian airport or seaport that offers Visa on Arrival services. If you’re flying directly to Bali, Ngurah Rai International Airport is an eligible entry point.
What is the Visa Fee for Indians Visiting Bali?
The standard Visa on Arrival (VOA) fee for Indian travellers visiting Bali is IDR 500,000 (approximately US$35 or ₹2,800) per person, as of October 2026. This fee applies to the standard 30-day VOA for eligible visitors to Indonesia. The amount in Indian rupees may vary with the exchange rate, so check the latest conversion before your trip.
You can pay the visa fee at the airport or apply for an electronic Visa on Arrival (e-VOA) online before departure.
- Credit or debit card: Eligible cards are accepted at designated payment counters.
- Cash: Carry Indonesian rupiah in case you need to pay in cash, and check which currencies the counter accepts.
- Online payment: If you’d rather sort out your visa before leaving India, you can apply and pay through the official Indonesian Immigration e-Visa portal.
Note: Since I’ve visited Bali twice, I’d recommend sorting out the visa process before your flight if you prefer to avoid extra paperwork on arrival.
How to Apply for an eVisa for Bali from India?
If you’d rather have your visa sorted before boarding your flight, you can apply for an electronic Visa on Arrival (e-VOA) online. When I visited Bali for the second time, I found that preparing travel documents in advance can make the arrival process much smoother.
Here’s how Indian travellers can apply for a Bali e-VOA:
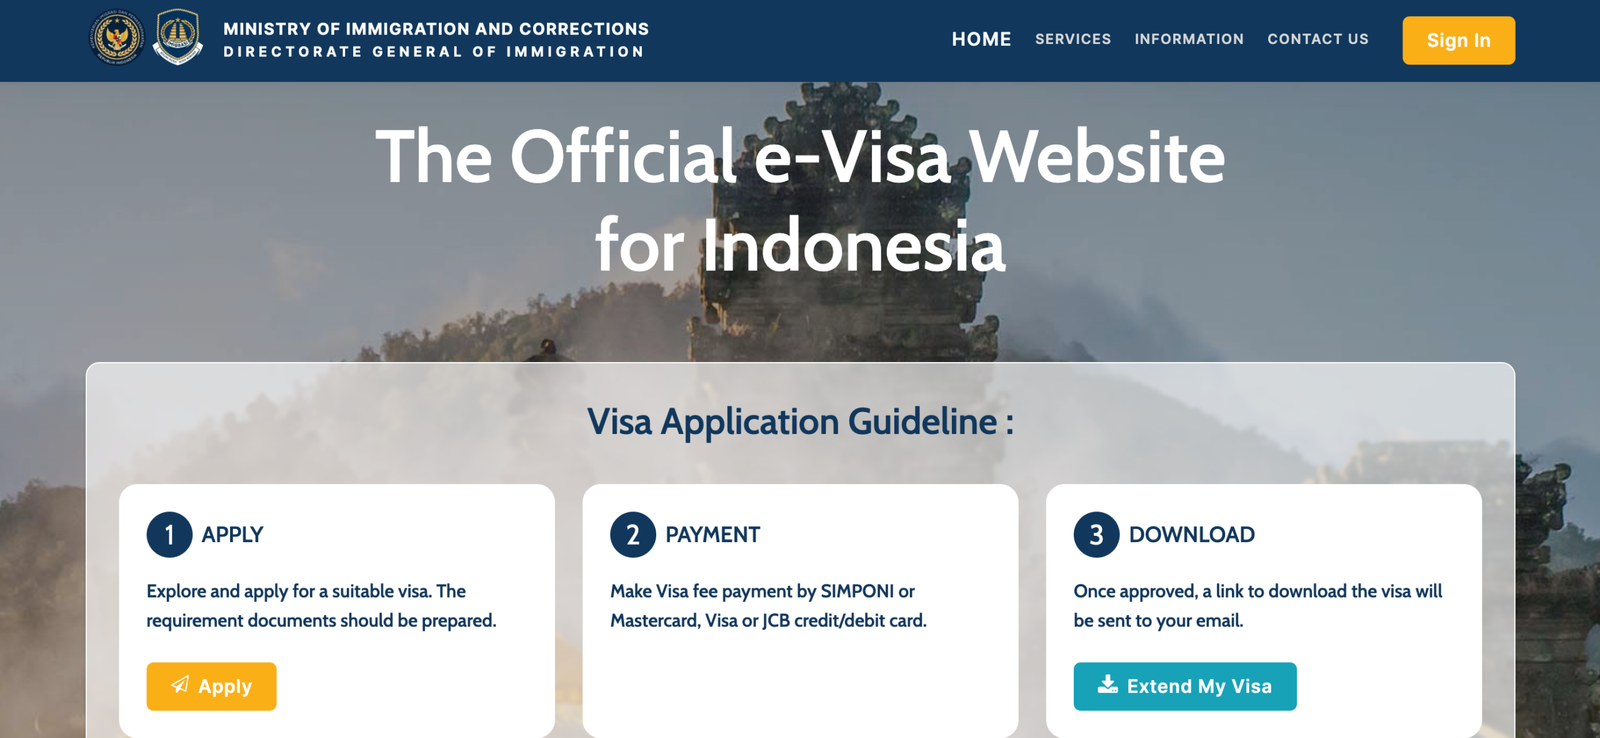
Step 1: Visit the Official Website
Head to the Indonesian Immigration e-Visa portal and select the appropriate Visa on Arrival option for tourism.
Step 2: Keep Your Documents Ready
In order to apply, you’ll need the following:
- An Indian passport valid for at least six months from your arrival date.
- A recent passport-style photograph.
- A confirmed return or onward flight ticket.
- Your accommodation details in Bali.
Step 3: Complete the Application
Enter your personal and passport details carefully, upload the required documents, and check that all information matches your passport.
Step 4: Pay the Visa Fee
Pay the applicable fee online using an accepted debit or credit card. The standard 30-day tourist VOA fee is IDR 500,000. Check the portal for the current amount and any applicable payment charges.
Step 5: Download Your e-VOA
Once your application is approved, download the e-VOA and save a copy on your phone. It’s also a good idea to carry a printed copy in case you need to show it to airline staff or immigration officials.
A few things to remember: The standard e-VOA generally permits a stay of up to 30 days and may be extended once for another 30 days, subject to the applicable rules.

Can I Get a Multiple-Entry Visa on Arrival for Bali?
No, the Visa on Arrival (VOA) available to Indian travellers visiting Bali is a single-entry visa. Here’s what that means for your trip:
- One entry only: The standard VOA allows you to enter Indonesia once and stay for up to 30 days.
- Leaving Indonesia: If you leave Bali for another country before your visa expires, your VOA becomes invalid. You’ll need a new visa to re-enter Indonesia.
- No conversion to multiple entry: You cannot simply upgrade your existing VOA to a multiple-entry visa while in Indonesia.
What If You Plan to Visit Bali Multiple Times Within A Year?
If you plan to visit Bali or other parts of Indonesia several times within a year, consider applying for a multiple-entry visit visa before your trip. Depending on the visa category, you may be able to enter Indonesia multiple times during its validity, with each stay subject to the permitted duration and conditions. This option can be useful for frequent travellers, business visitors, or those visiting family in Indonesia. Check the official Indonesian Immigration website to confirm the appropriate visa category and stay limits before applying.
Can Indians Extend Their Bali Visa on Arrival?
Yes, Indian travellers visiting Bali on a Visa on Arrival (VOA) or eVisa can generally extend it once for an additional 30 days, allowing a total stay of up to 60 days. If you’re planning to linger longer on the island, make sure you start the extension process well before your initial visa expires.
Step 1: Start the Extension Process Early
You can apply for an extension through the Indonesian Immigration authorities. Check the current procedure for your visa type, as the process may differ depending on whether you obtained a physical VOA at the airport or an eVisa on Arrival (e-VOA) online. Don’t leave it until the last few days, because that might lead to a complicated process!
Step 2: Keep Your Documents Ready
You may need the following documents for your extension:
- Your original passport, valid for the required period.
- A copy of your passport’s biodata page.
- Your VOA or e-VOA details.
- Your Indonesian entry stamp, if applicable.
- Proof of onward or return travel, if requested.
Check the latest document requirements before visiting an immigration office or starting an online application.
Step 3: Submit Your Application
Follow the instructions provided by Indonesian Immigration for your visa category. You may need to attend an appointment or provide biometric information, such as a photograph or fingerprints.
Step 4: Pay the Extension Fee
The standard VOA extension fee has traditionally been IDR 500,000. Fees and exchange rates can change, so confirm the current amount through the official Indonesian Immigration website before applying. Avoid overstaying your visa. Indonesia imposes an overstay fine, and this can complicate future travel.
Step 5: Complete Any Additional Immigration Formalities
Processing times vary, and immigration officials may request additional documents or an in-person appointment. Follow the instructions provided with your application and keep your travel plans flexible until the extension is approved.
Step 6: Check Your New Visa Expiry Date
Once your extension is approved, verify the updated expiry date and keep a copy of the approval with your travel documents. Make sure you leave Indonesia before your authorised stay ends.
My tip: Bali is the kind of place where a few extra days can easily turn into a few extra weeks. When I visited the island for the second time, I was reminded of how much there is to explore, from Ubud’s lush rice terraces to Canggu’s café scene and Uluwatu’s dramatic coastal views.
If you want to stay longer, sort out your visa extension early rather than leaving it until the last minute. And in case you have any questions about planning your trip to Bali, drop a comment below!

My recent trip to Bali was with two of my friends, Dipti (left: in Mt. Batur) and Sanj (right: in Nusa Penida).
Disclaimer: This post contains a few affiliate links. If you click any of them and make a purchase, I might earn a small commission at no extra cost to you. Just know that I truly appreciate your support if you choose to do so.
Tags:
Share:



About Me
I travel to collect stories, slowly and meaningfully, with an open heart. I wander a little farther for good food, linger longer to understand a place, and write so I can call it “work.” A slow traveller at heart, I believe in experiences over checklists, in moments that unfold at their own pace, and in connections that stay long after the journey ends.
An absolute foodie and die-hard mountain lover, I find my happiest moments in quiet Himalayan towns with a cup of lemon-honey-ginger tea in hand. Over the years, I’ve had the joy of exploring places across India and beyond, each trip teaching me something new about people, cultures, and myself. When I’m not lost in thought or coffee, you’ll find me exploring the world one destination at a time, always looking for places that make me feel something. I love to read and write (give me a book and I’ll love you all the more) and share honest insights, real photos, and thoughtful recommendations from my own travels, so you can experience every place a little deeper, a little slower, and with just the right touch of comfort.
 Pinterest
  Linkedin
  MuckRack
Exploring The World, One Place At a Time!