
Sweden Schengen Visa for Indians: Here’s A Step-By-Step Guide
Getting a Schengen visa for Indians can be stressful, and trust me, I get it. Last year, when I was planning my trip to Sweden, I experienced what I can only call real visa anxiety. So if you’re planning a trip to Sweden (or anywhere in Scandinavia) and applying for your visa, here are my two cents to make things a little easier for you.

Sweden has become quite a popular destination among Indian travellers, especially for those hoping to witness the breathtaking Northern Lights. Sadly, I didn’t get to see them because I spent most of my time in Lund, in southern Sweden.
Here’s a simple, step-by-step guide to apply for a Swedish Schengen visa for Indians.
List of Documents Required to Apply for A Tourist Schengen Visa for Indians
A lot of people will tell you to book your VFS appointment first, but I’d honestly recommend sorting out your documents before you do that. Take a week and calmly put everything together, especially if this is your first time applying for a Schengen visa. This small step can save you from a lot of last-minute stress and confusion.
1. Fill the Application Form Carefully
The application form is available online, and this is one step you shouldn’t rush through. Fill in all the details carefully and double-check everything before submitting. The embassy or consulate reviews your application thoroughly, so treat this part with extra care.
2. Passport Size Photographs
Don’t forget to carry two recent passport-size photographs. Ensure they meet Schengen visa photo specifications, as incorrect photo formats can cause unnecessary delays.
3. Book Your Flights & Hotels (Go for Refundable Options)
Get your flights and hotels booked once your documents are in place. I’d suggest booking refundable flight tickets and choosing hotels through platforms like Booking.com or Agoda, as they offer free cancellations. This gives you flexibility in case your travel dates or plans change.
4. Write a Clear Cover Letter
Your cover letter should clearly state your intent to visit Sweden, include your itinerary, and highlight any specific experiences you’re looking forward to. Make sure your hotel bookings are properly mentioned.
P.S: When I travelled to Sweden, my partner was attending a conference at Lund University, so I mentioned that in my own plans. This gives the visa officer a clear picture of your trip.
5. Employment / Sponsorship Documents
If you’re employed, you’ll need to submit a No Objection Certificate (NOC) from your employer along with your last three months’ payslips. If you’re self-employed, provide proof of your business and financial stability. In case you’re submitting a sponsorship letter, make sure you include details of the person sponsoring your trip, along with their financial proof. This helps establish who’s funding the trip and adds credibility to your application.
6. Travel & Medical Insurance (Mandatory)
Travel and medical insurance are mandatory while applying for a Schengen visa. Make sure your insurance covers at least €30,000 in medical expenses and is valid for the entire duration of your trip. This is a non-negotiable requirement, so don’t skip this step.
I usually prefer getting the ICICI Lombard Insurance, but you can also check out other options (there are plenty!).
7. For Minors: Birth Certificate & Parental Consent
If you’re applying for a Schengen visa for a minor, you’ll need to submit the child’s original birth certificate along with the application. If the minor is travelling alone or with only one parent or legal guardian, parental consent is required. Also, the visa application form must be signed by both parents. This is an important requirement, so make sure all documents related to the minor are complete to avoid any delays or issues with the application.
8. Proof of Sufficient Funds
You’ll need to provide proof that you can financially support yourself during your stay in Sweden. For this, submit your last six months’ bank statements. This reassures the visa officer that you’re financially capable of covering your travel and stay expenses (which usually is around INR 4500 per day, roughly!).
9. Income Tax Returns (Last 3 Years)
Make sure you include your ITR documents for the last three years. This strengthens your financial profile and helps build trust in your application.
The only thing to remember is to be thorough with your application. It’s always better to provide a little extra detail than to miss out on something important that could increase the chances of your visa being refused.
Additional Supporting Documents (If Applicable)
- If you’re not fully sponsoring your own trip and a friend or family member is helping you financially, you’ll need to submit an official sponsorship letter. This letter should be signed by the sponsor and clearly state your relationship with them, what they do, and proof of their financial capacity (such as bank statements). Basically, the visa officer should be able to understand who is funding your trip and why.
- If you’re visiting a friend or family member in Sweden, you’ll need to attach an invitation letter, your host’s passport details, residence permit or visa information, and proof of accommodation. The invitation letter should clearly state your relationship with the host, the purpose of your visit, their personal details, and whether they’ll cover any of your expenses during your stay.
- In case you’re sponsoring your spouse’s trip (or vice versa), make sure you attach your marriage certificate as proof of relationship.
Just to share from my own experience: My partner had an official invitation letter from his university in Lund, which helped his visa get processed in just 3 days. Mine, on the other hand, took around 10 days since I was applying as a tourist. So yes, invitation letters (especially from institutions) can really speed things up.
Book Your VFS Appointment
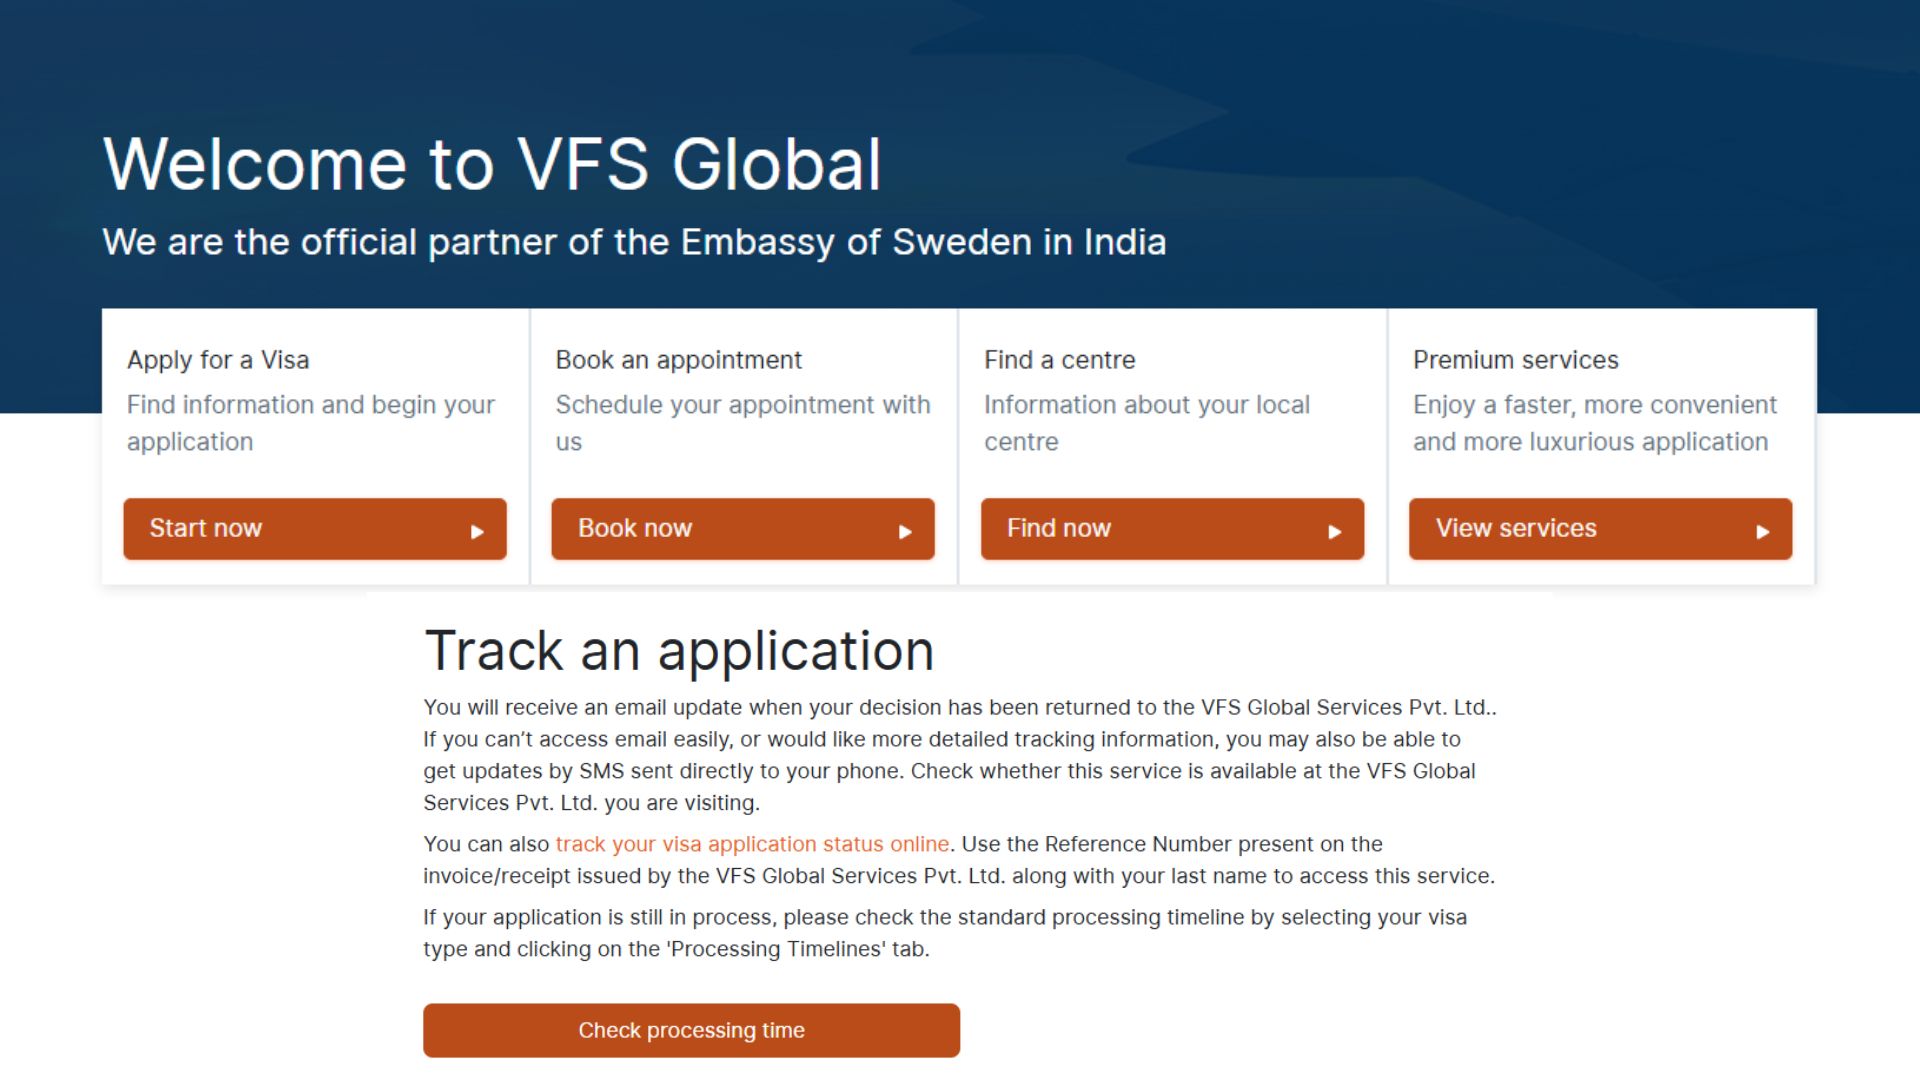
To book your VFS appointment, visit the VFS website and go to the Apply for a Visa section. From there, open the Book an Appointment option and click on the link to begin the process. You’ll be redirected to the appointment booking page, where you can click on Book Now to proceed.
If you don’t already have an account on the VFS portal, you’ll need to sign up first. If you’ve used VFS before, simply log in with your existing credentials.
Once you’re logged in, click on Start New Booking to begin your application.
On the appointment details screen, choose your Visa Application Centre from the dropdown menu. This is usually the city you live in or the one closest to you.
Then select the Appointment Category and Sub-Category. For most tourist visas, the category is pre-filled; if not, select the default option.
Under the subcategory, choose Tourist or Visitor depending on your travel purpose.
After entering these details, the system will show you the earliest available appointment slots. If a slot is available, continue with the process.
Next, you’ll be asked to enter your personal information, including your name, date of birth, gender, nationality, passport details, contact number, email ID, and home address. Fill these in carefully and save your details. If you’re applying as a group, you can add more applicants at this stage. You’ll also see the VFS service fee for your application (INR 1,950 as of Nov 2025).
Once you proceed, you’ll be asked to verify your details using an OTP sent to your registered contact information. After successful verification, you’ll be taken to the slot selection page. Here, choose a convenient date and time for your appointment. You’ll also have the option to add any extra services you might need before moving ahead.
Finally, review all your details one last time and proceed to payment. You can complete the payment using options like credit/debit cards, net banking, UPI, or wallets.
Once the payment goes through, you’ll receive an appointment confirmation email. Make sure you carry this confirmation with you on the day of your VFS appointment.
Visit the VFS Centre on Your Appointment Day
On the day of your appointment, try to reach the VFS centre at least 15–20 minutes early. You’ll need to show your appointment confirmation letter and passport at the entrance, so keep those handy. Once inside, look for the counter assigned to Sweden (each Schengen country has its own desk) and collect a token for your application.
Application Submission
When your token number is called, head to the submission counter and hand over your passport, photographs, and all the required documents for your Sweden Schengen visa. The VFS staff will quickly go through your file and let you know if anything is missing or incomplete. In case a document is missing, you may be asked to submit it later or sign a declaration explaining why you’re unable to provide it. This step is important, so try to ensure your file is complete to avoid delays.
Pay the Visa Fees
After your documents are accepted, you’ll receive an invoice for your visa application. Take this to the payment counter to pay the visa fee. It’s a good idea to carry some cash with you, as card machines don’t always work at VFS centres. Once the payment is done, submit the receipt back at the counter. You’ll then be given an acknowledgement slip with your visa application details and reference number, which you can use to track your application online.
Biometric Submission
The final step is biometrics. You’ll be directed to the biometric section where your fingerprints will be taken and your photograph will be clicked. After this, submit your file at the counter as instructed, and you’re done.
That’s it — your Sweden Schengen visa application has officially been submitted.
Now comes the waiting (and hoping) part!
Wait for Visa Processing
Typically, the visa processing time is around two weeks. However, during peak travel seasons, it can take up to a month. The good part is that you can book your VFS appointment up to six months in advance, so planning early really helps if you’re travelling during busy periods.
[Also Read: Sweden Visa Processing Time & How to Avoid Delays]
Track Your Application Status
Once you’ve submitted your application, you’ll receive a visa application number. You can use this to track your application status online, which honestly helps a bit with the waiting anxiety because at least you know what’s happening behind the scenes.
A Quick (Important) Heads-Up
This is something I found out at VFS, and I think it’s important to mentally prepare for it. If your visa is approved, your passport is usually sent to your address by courier. However, if you’re asked to come to the VFS centre to collect your passport after processing, there’s a chance that your visa has been rejected.
Not saying this will happen, but just sharing this FYI so you’re not caught off guard and can manage your expectations while waiting.
Applying for a Schengen visa can feel overwhelming at first, especially if it’s your first time. But once you break the process down step by step and give yourself enough time to prepare, it becomes a lot more manageable. The key is to stay organised, be honest and thorough with your documents, and avoid leaving things until the last minute. A little extra effort here can save you a lot of stress later.

I hope this guide helped you understand how to apply for a Schengen visa from India, especially if Sweden is on your travel list. If you still have questions or feel stuck at any point in the process, drop them in the comments below. I’ll try my best to help you out.
Disclaimer: This post contains a few affiliate links. If you click any of them and make a purchase, I might earn a small commission at no extra cost to you. Just know that I truly appreciate your support if you choose to do so.
Tags:
Share:


About Me
I travel to collect stories, slowly and meaningfully, with an open heart. I wander a little farther for good food, linger longer to understand a place, and write so I can call it “work.” A slow traveller at heart, I believe in experiences over checklists, in moments that unfold at their own pace, and in connections that stay long after the journey ends.
An absolute foodie and die-hard mountain lover, I find my happiest moments in quiet Himalayan towns with a cup of lemon-honey-ginger tea in hand. Over the years, I’ve had the joy of exploring places across India and beyond, each trip teaching me something new about people, cultures, and myself. When I’m not lost in thought or coffee, you’ll find me exploring the world one destination at a time, always looking for places that make me feel something. I love to read and write (give me a book and I’ll love you all the more) and share honest insights, real photos, and thoughtful recommendations from my own travels, so you can experience every place a little deeper, a little slower, and with just the right touch of comfort.
 Pinterest
  Linkedin
  MuckRack
Exploring The World, One Place At a Time!